4 DIY Magic Wands for Your Kids' Magical Costume · Craftwhack
Magic wands are much-loved past kids and they are an important prop for many children'due south costumes. Witches, fairies, wizards, pixies, and all manner of other characters benefit from a magic wand – and your kid will honey using it out of costume also every bit in.
With that in listen, let's look at some DIY magic wand ideas for you to make with your little one and then you tin can bring a bit of sparkle to their life.
Simple Stick Wand
Source: https://world wide web.happyfamilyart.com/arts and crafts-tutorials/magic-wand-arts and crafts-tutorial/
If you want a very easy arts and crafts that y'all can do with the help of a little ane, this is the perfect approach. It'southward unproblematic and will add a dash of magic to any outfit. Y'all can also exercise it in any color at all, then choice whatever your kid likes all-time, and get crafting!
Materials
For a simple stick wand, you're going to need:
- ane wooden skewer
- Scissors
- Glue
- Paint
- Paintbrush
- Colored card
- Glitter glue
- A few ribbons
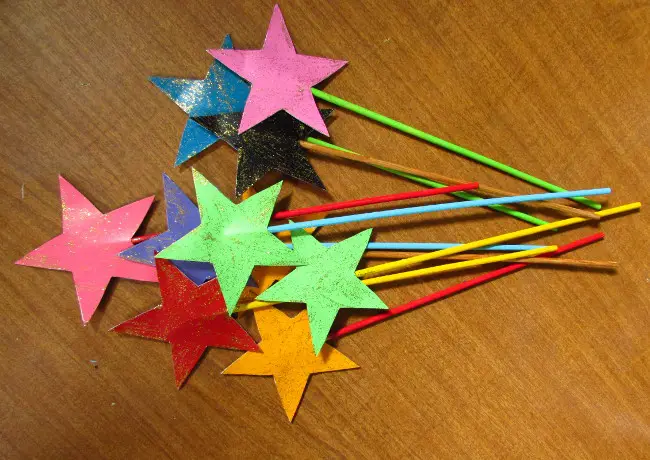
Step 1: Cut Out Your Star
First of all, you need to cut out a star. You tin can draw 1 by hand or print a template from the cyberspace easily. Depict this onto your colored card, and then cut around the edges neatly.
To brand your wand more than durable, it's best to apply two colored bill of fare stars glued together, but you don't have to exercise this if you don't desire to. Only describe effectually your first star to create the second one, and then glue them together.
If necessary, one time the glue has dried, trim the edges of the stars a scrap to make sure they fit nicely.
Pace 2: Paint The Skewer
Get your child to assist you paint the skewer; this is going to be the stick of the wand. Information technology tin assist to use a peg to concur it. You may need to allow one-half dry before you can paint the other one-half, or you lot'll cease up with smudges and sticky fingers.
Footstep three: Stick On The Star
Decide which is the front of your wand'south magic star, and then glue the back to the tip of the skewer. Make sure that it is glued very firmly.
Some people like to slip the skewer in between the two stars to brand a neater finish; you lot can do this if you prefer.
Pace 4: Decorate The Star
Add some glitter glue or sparkly gems to the star, making it beautiful and "magical" for your child. Get them to help you determine what to add. If they desire to decorate the star with pens, information technology is all-time to practise this before you stick information technology to the skewer every bit this will give them a flat surface to work with.
Yous can likewise add together sequins or little beads in a border around the star to make it extra sparkly.
Pace 5: Add The Ribbons
What's a star without a swish of magic? If y'all have some ribbons, they make a wonderful addition to the star. Crimper ribbons are best, only any will do and will make the wand much more satisfying to wave when casting spells.
If you're using curling ribbons, score them with a pair of pair of scissors to get a overnice ringlet, and and so glue the end to the bottom of the star. Add a few dissimilar lengths, and try to become tighter and looser curls on them. You can even use different colors to make them look more interesting.
At this betoken, your star is finished and your child tin go and start casting magic!
Tip: to turn this wand into a witch's wand, utilise black and silver ribbons, blackness pigment, and a black star.
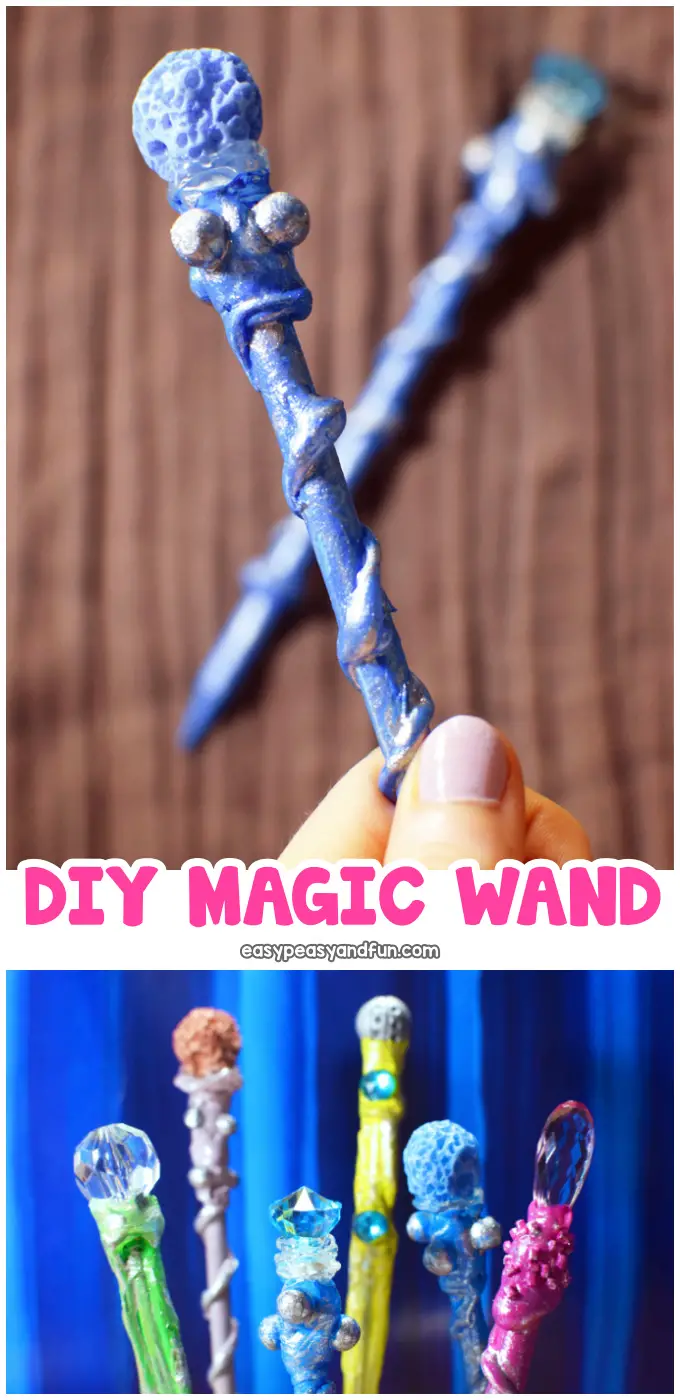
Twisty Wand Pencil
Source: https://www.easypeasyandfun.com/how-to-make-a-magic-wand/
Do you have a super special fairy in your life, or a child that wants to be a magician? If so, the thing that they really demand to complete their character is a wand to make the magic of their imagination come to life – and you lot tin can aid them create 1 with this clever craft.
Magic wands come in all shapes and sizes, and this craft is perfect because your child can create the wand of their dreams by following the simple instructions. Whether they desire to be a sorcerer, a fairy, a witch, a wizard, or any other magical beingness, they can build the perfect wand for their make-believe world.
Y'all will but need a chopstick (for a long wand) or pencil (for a short wand), some hot glue, a few decorative stones, some plastic chaplet or gemstones, and some brightly colored paint (or several paints if you prefer). This is the perfect way to make your child feel special and magical.
You might want to brand multiple wands with your piddling one so they tin can swap their personas, and no matter what, each wand will be wonderfully unique. Cheap, easy, and super fun, this is definitely a craft to endeavour, and its fun will long outlast the making session.
Exist prepared for shouts of "Abracadabra" and "Alakazam!" every bit your child enjoys their new toy and experiments with it.
Natural Stick Wand
If you're aiming for a woodland fairy look, you can also aid your child create a stick wand. This is keen fun; you can collect all sorts of things to decorate with on a nice country walk, and yous can claiming your child to come upwardly with "nature spells" that they might similar to cast.
The aim hither is to use as many natural materials equally possible; we may non exist able to become totally eco-friendly, merely we're going to effort our best.
Materials
For this project, you're going to need:
- A long, reasonably sturdy stick with lots of natural twists and bumps
- Some skeleton leaves (natural or dyed)
- Natural twine
- White gum
- Glue gun
- Scissors
- A gem
Yous may also desire to use:
- Tiny pebbles or little shells
- Pressed flowers
- A shop-bought crystal
- Feathers
Step 1: Go On A Hunt For Wand-Parts
I of the all-time bits of creating this wand is the chase for different parts. Talk to your child almost what sort of woodland fairy they want to exist, and decide what you're going to await for on your walk.
Call back that if you use things like grass or fresh flowers, the wand won't terminal well, so information technology may be better to cull components that can be dried or that won't wither. You should also avoid picking wild plants as many are protected and this can exist harmful to nature.
You must make sure you discover a suitable wand-stick on your walk. It may be a good idea to choice upward a few dissimilar options so y'all tin try them out at home; you tin can ever put sticks back later on if yous decide they are non needed.
Footstep 2: Decorate Your Stick
Ready out your stick and all the things you lot have collected, plus anything else that you plan to utilize. Experiment a bit with different looks before yous stick annihilation in place.
You may want to air current the natural twine upwards and effectually the wand stem to requite information technology a "core" of ability. If you're going to use a crystal from a shop, yous will probably want to glue this to the end of the stick (or utilize a colorful jewel).
Consider creating a little ring out of the pebbles or shells, or assistance your child to gum the pressed flowers to the stick. The skeleton leaves tin can exist used to fan out around the top of the wand or tin can be pasted around its stalk.
Feathers tin be used like the ribbons in the get-go tutorial; glue them so that they fan down from the precious stone at the superlative, creating a overnice "swish" when your kid waves the wand. Little puffy feathers volition have a better effect than long, stiff feathers.
Y'all tin can add some glitter or sequins too, but this won't be quite then in keeping with the "natural" theme.
Stride 3: Varnish The Wand (Optional)
Yous may find that your wand is a little more than durable if you add a couple of coats of white mucilage to serve as varnish. To practise this, mix some white glue with a little water, and add together a thin layer on superlative of the wand (avoiding whatsoever feathers as it will spoil them).
When that layer has dried, add together a 2nd or even 3rd coat. This will make the wand more than rigid and also add a nice shine to the wood. When it's dry, your child tin can start casting spells to make the trees abound and the grass sing.
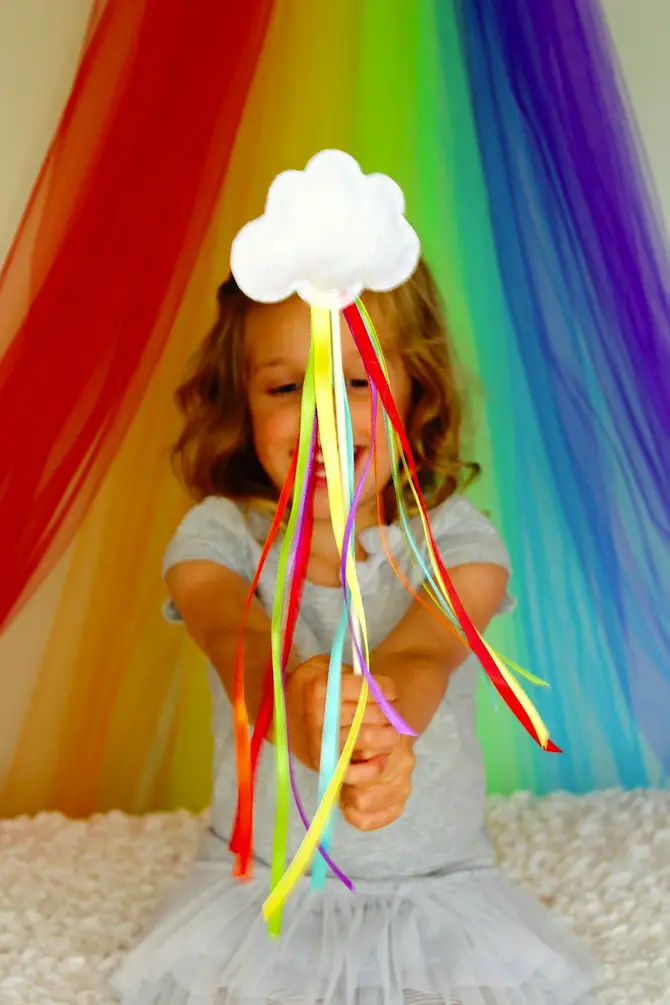
Unicorn Wand
Source: https://www.prettyprudent.com/diy-no-sew together-rainbow-wands/
How most a felted wand? You can take fun with all kinds of unlike shapes hither, but we're going to practise a cloud with a rainbow unicorn tail streaming out of it.
Materials
To create a cloud wand, you'll need:
- White felt
- A wooden skewer
- Pretty newspaper
- Gum
- White thread
- Needle
- Pins
- Rainbow ribbons (either multicolored or several ribbons in different colors)
- Pair of scissors
- Stuffing
- Black pen
- Glitter or sequins
Footstep i: Create The Deject
Describe a small, puffy deject on your white felt, and and so cut it out and depict effectually it to create a second puffy cloud the same size. Pin the ii parts together neatly.
Sew around the edges of the 2 clouds, leaving a small gap at the bottom so yous can add together stuffing and the skewer.
Step 2: Wrap The Skewer
Wrap the skewer up in your pretty paper. The easiest style to do this is to put a layer of white gum on the skewer and then roll information technology up in the paper, calculation a little gum to make sure it'south firmly stuck all the way around.
Cut off the excess paper, and you'll have a beautiful stalk for your fairy wand. You can besides paint the skewer a pretty color if that's easier for you.
Pace 3: Stuff The Cloud
Next, it's time to brand your deject puffy. Add some stuffing to it, carefully filling it and then that you don't burst the stitches only you finish upward with a satisfyingly rounded deject.
Add a generous blob of glue to the end of your skewer and slide it into identify in the cloud. Next, sew the cloud close and add a fiddling more glue around the edges where the skewer meets the felt to brand sure this bring together is nice and secure.
Step four: Create A Rainbow Tail
You lot can only add pastel ribbons around your deject to add to the pearly effect, but we're going to do a rainbow tail instead. This can exist washed either using curling ribbons or fabric ribbons. Choose nice, juicy colors to get a adept issue.
Glue the ribbons around the end of the skewer, where it meets the cloud. If yous're using curling ribbons, add ringlets to them before you stick them in place. If you're using fabric ribbons, try to cut them dainty and long and then they tin flutter and twirl with the wand's movements.
Footstep 5: Decorate The Deject (Optional)
You can add a scrap of glitter to the cloud, or stick some pretty sequins to information technology to make it extra magical. You now have an amazing unicorn wand, perfect for any fairy. If you wanted to, yous could also add a footling unicorn sticker (paste it down with a layer of mucilage to help it stay stuck) to include a concluding touch of magic.
Conclusion
Wands come up in all shapes and sizes, and you can have countless fun creating magical wands with your trivial fairy child. Well-nigh of these ideas can exist adjusted to adapt different tastes and work for different kinds of fairy, so get artistic and practice whatever you like; there are pretty much no limits here!
Source: https://craftwhack.com/diy-magic-wand/
0 Response to "4 DIY Magic Wands for Your Kids' Magical Costume · Craftwhack"
Post a Comment